The Official Guide to NoteFluent
Welcome! This guide will walk you through everything you need to know to transform your sight‑reading, from your first note to advanced custom exercises.
Welcome! This guide will walk you through everything you need to know to transform your sight‑reading, from your first note to advanced custom exercises.
Traditional methods teach you to slowly identify notes one by one. NoteFluent is different. By showing you a constantly but gently shifting musical line, it trains your brain to instantly recognise the relationships between notes - the intervals, the shapes, the patterns. This is the key to true fluency.
Your goal is simple: play along with the notes you see. As you do, you'll stop translating and start reading.
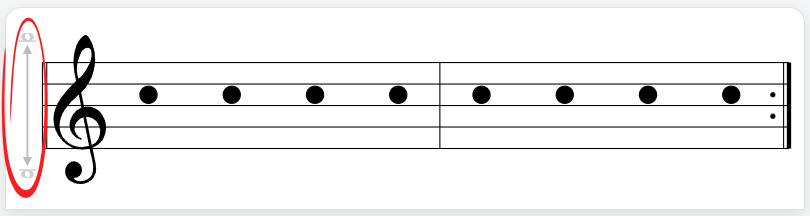
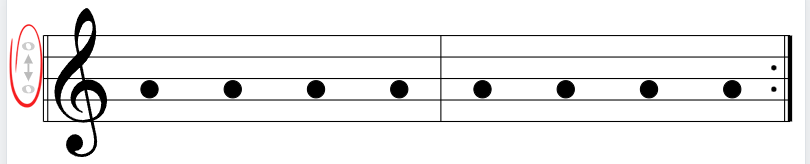
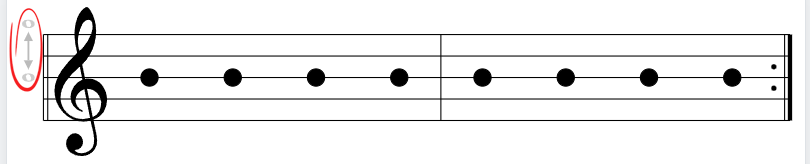
Welcome! Even if you've never read sheet music before, you'll be up and running in no time. The app starts you off gently by playing the same note eight times in a row.
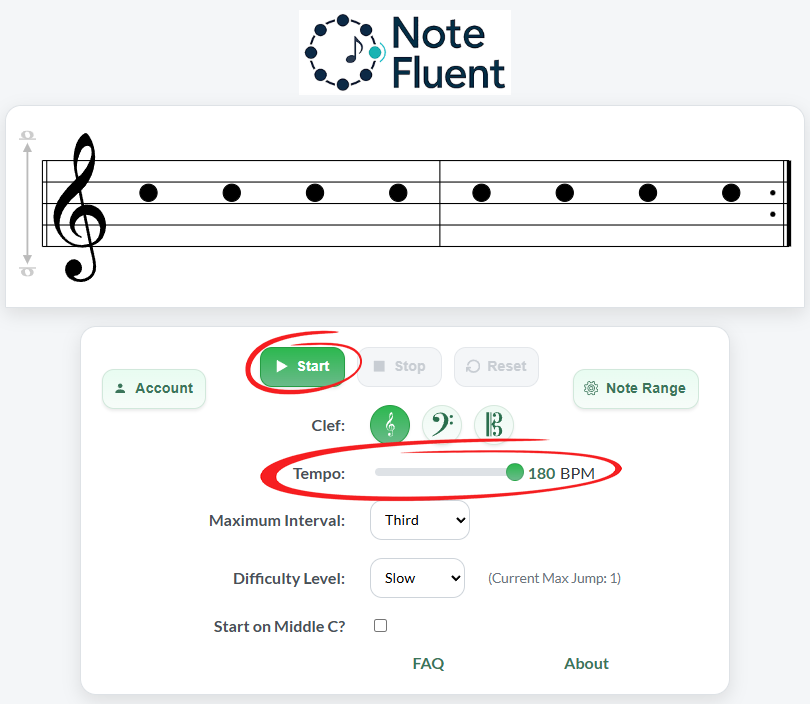

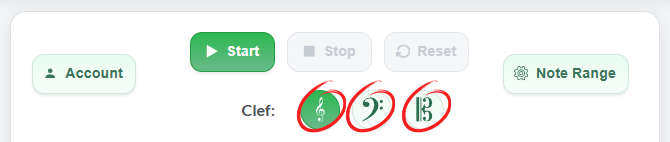
Because every instrument and musician is different, NoteFluent lets you choose from several clefs and set your own note range.
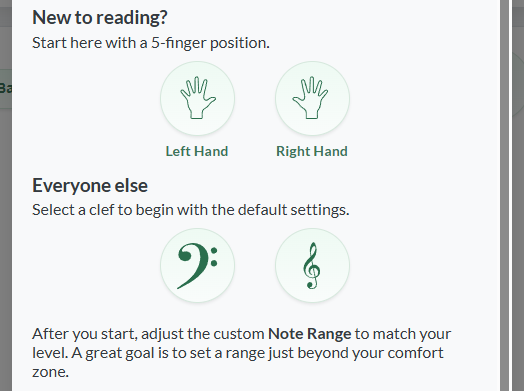
The quickest way to get set up is to use one of the built‑in instrument presets.

The Guitar, Violin, and Cello presets will instantly apply the correct clef and a standard playing range. The Piano and Singer buttons open "Quick Start" windows with more tailored options to get you practising even faster.

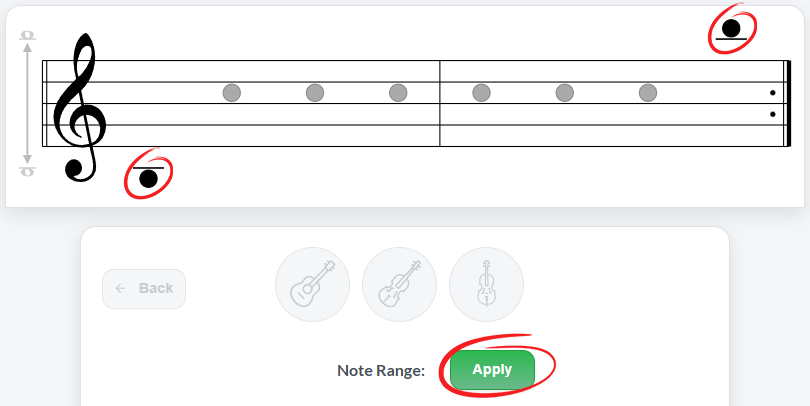
Don't see your instrument? Please let us know! In the meantime, you can easily set up any instrument by choosing a clef and setting a custom note range manually.
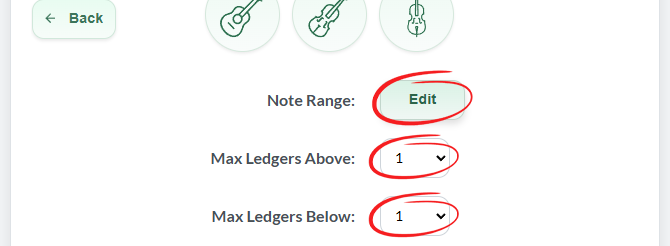
Set Your Custom Note Range. After selecting your clef, click the Note Range button.

Over time, you'll begin to be able to:
The more you let go of impatience and trust the process, the better you'll be able to be aware of all those things at the same time!
It's much better to practise for five minutes every single day than to spend a long time on certain days with gaps on other days. You can build a streak with just two minutes of using this app every day - even this short amount, every single day over a few weeks, will make a noticeable difference!
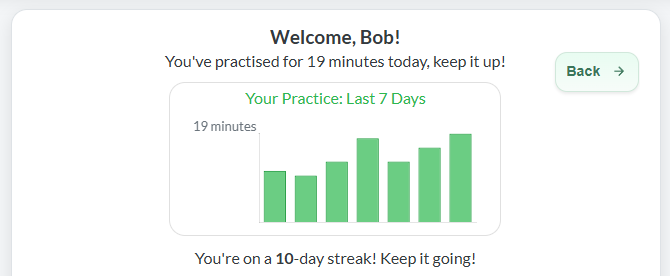
Create a free account to unlock powerful progress‑tracking features.
When you're logged in, all your settings - clef, tempo, custom range, difficulty, note pitches, etc - are saved automatically. The next time you visit, you can pick up right where you left off. Your dashboard will show you how much you've practised and display your weekly progress on a chart.
Practise for at least two minutes in a day to count towards your consecutive day streak. It's a great
way to stay motivated!
If your internet connection drops, NoteFluent keeps working. Any practice time is saved locally to
your device and automatically syncs to your account the next time you're online, so you never lose
your progress or break your streak.
(make sure you don't delete your cookies or cache until you're back
online)
Once you're comfortable, you can personalise the settings to target specific areas and adjust the difficulty.


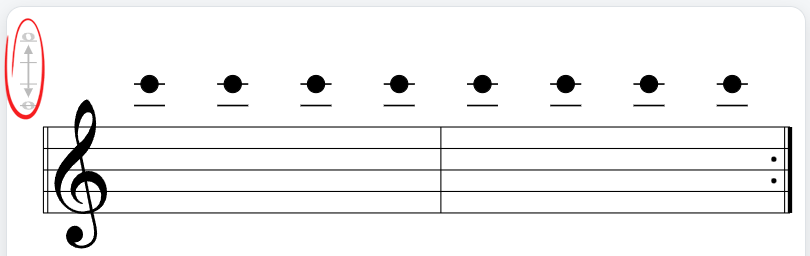
Look at the pieces you're currently learning. What's the lowest and highest note? Set your Note Range to match - you'll be practising exactly what you need!
Try an unfamiliar clef within your instrument's range. For example, most musicians can't read any of the C Clefs - this is a great test of your ability to rely purely on interval recognition, the ultimate sight-reading skill!
Don't worry that the app doesn't test sharps and flats - this app is inspired by a method I've used for decades with a simple whiteboard and magnets to help students master reading intervals - and it's proven to be incredibly effective! (Key signatures planned for a future update)
The Piano preset button opens a Quick Start window with presets for beginner 5-finger positions or default clef setups. For more detailed advice and strategies, read on.
This is true! However, practising one hand at a time with NoteFluent is incredibly valuable at every level. By training your brain to recognise intervals rather than label individual notes, you'll transform your sight-reading in both hands.
The most common question I get from pianists is about fingerings: "How do I know which fingers go on which notes?" Here's what works:
The app now allows a minimum range of just a fourth. This allows orchestral string players (Violin, Viola, Cello) to practise entirely on a single string in first position.
For example, violinists: set your range from Open A to the D just above. This covers the four fingers on your A string without needing to cross over.
Tip: Start with this narrow range, and when you feel more comfortable, gradually increase the range to include notes from other strings.
Intermediate and advanced players can systematically master different positions:
We recommend starting with the minimum range of a fourth to keep things manageable.
A great strategy is to set your lowest note to an open string. For example, set the range from Open B to the Open High E. This gives you a simple, compact set of notes to practise.
Sight-singing is one of the most powerful skills a musician can develop. NoteFluent is an excellent tool for training your ear to recognise relative pitch and intervals accurately.
Click the Singer icon in the presets panel to open the Vocal Quick Start window. From here, you can select a preset that matches your voice type (e.g., Soprano, Alto, Tenor, Bass). This will set a comfortable starting range and clef for you.
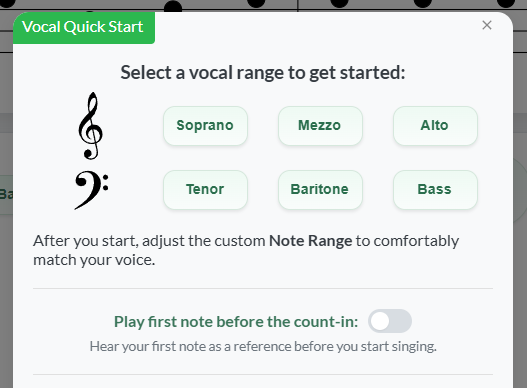
A crucial feature for singers is the "Play first note before the count-in" toggle. When enabled, the app will play your first note for two beats, giving you a clear reference pitch before the exercise begins. This helps ensure you start on the right note every time.
After selecting a preset, feel free to go into the Note Range Editor to fine-tune the highest and lowest notes to perfectly match your comfortable vocal range.
Note for Tenors: The Tenor preset currently uses the standard bass clef. An octave-transposing treble clef (8vb) is planned for a future update.
Head over to the app, press Start, and begin your journey to sight‑reading fluency.